Saturday, November 27, 2010

Thanksgiving Soup

Mmmmmmm Thanksgiving :) Probably my favorite meal of the year. I love when mom sends me home with Tupperware filled with the yummy goodness. This year after partaking in Thanksgiving meal number 3, I decided to try something new with some of my leftovers. I saw a lady do this on TV and it looked yummy… so I made my own version.

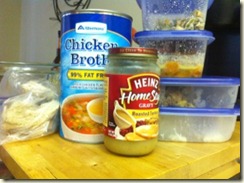
First I gathered all my leftovers and some chicken broth. You could also make your own Turkey stock by boiling your carcass in water for several hours and saving the drippings from when you originally cooked it. My mom is making turkey noodle soup with ours, so I just used chicken broth.

photo (3)

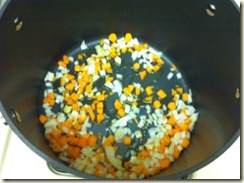
Since I had some onions, garlic and carrots in my fridge I decided to get a little fancy with my soup :) I chopped up some carrot, onion, and garlic and started by sautéing them in some olive oil until they were starting to soften and get some color. I would have used celery if I had it, but I didn’t, so since I had some celery seed in my spice rack I threw in a little for flavor.

photo (2)

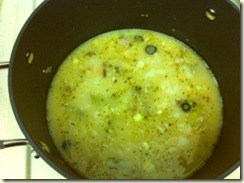
After that I deglazed the pan by adding my chicken broth, or you could use your turkey broth if you make it. That would be super yummy. I brought that to a boil and then dumped Thanksgiving into the pot. Now I may have just lost you on that step… but no you read me right. Dump Thanksgiving in the pot. Everything goes in. The leftover turkey (I used the dark meat hat we don’t like as much and gave mine a rough chop), green bean casserole, mashed potatoes, candied yams, stuffing, and even the gravy.

photo (1)

I added some extra spices at this point. A few dashes of oregano, Italian seasoning, thyme, rosemary, parsley. I don’t really think it matters… I just started putting things in that sounded like they would belong in a soup :)

“WHAT?!!??!” you say.

“Trust me” I say in response.

Let it simmer for about 20 minuets and……

photo

mmmmmmmmmmmmmmmmm everything that is yummy about Thanksgiving all in one delicious soup. You can even use your rolls to eat with the soup. (you thought I forgot about the rolls didn’t you)

It doesn’t sound like it should work… but boy it does.

enjoy!
Saturday, November 6, 2010

Wrist Pin Cushion

When I am sewing, it is always so annoying to try and stick a pin into my pincushion one handed and it scoots across the table.  Oh how handy it would be on my wrist.  I saw this tutorial months ago, and think about it each time I sew.  Since I have been sewing more than usual with making my nephew’s quilt, I decided that today was the day.

Here is the tutorial:

http://tearosehome.blogspot.com/2010/05/tutorial-sew-stylish-pincushion.html

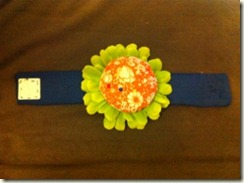
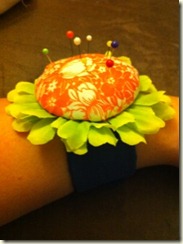
and here is how mine!

photo (1) photo

Pretty cute if I do say so myself.  The wrist part is blue (its hard to tell in the photo)  Super cute and even more handy. 

Wednesday, November 3, 2010

Noah’s Puff Quilt Part 1

I am so excited for my little nephew to arrive.  I have started working on this puff quilt for him.  I originally got the tutorial from http://www.honeybearlane.com/ but have made some changes to make it more functional for me :) 

First step: Buy The Supplies

I went for soft flannel fabrics since I thought it would be cozy for the little man.  I went with 8 different fabrics that were coordinating in patters that were white, blue, green, and brown.  She recommended finding 8 different fabrics but just four colors, so we will see how mine turns out.  I just picked ones that I thought were cute :)

I bought 1/2 yard of each fabric and have extra of each to do some coordinating other projects.

1 yard white muslin, however this was barely enough for the 64 squares, so I may need to go back for some more later

some fiberfill stuffing

I decided to get the rest of the materials once I needed them.

Second step:  Cut

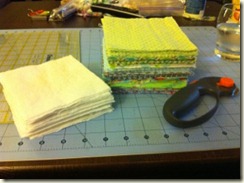
materials

Cut the muslin into 64 squares that are 4 1/2 x 4 1/2

Cut the pretty fabric into squares that are 5x5

Using a rotary cutter, self healing mat, and one of those handy clear ruler things made this a quick task.

Third Step: Sew

squares

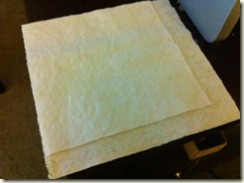
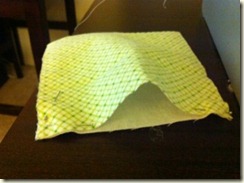
Lay the wrong sides together of the fabric, lining up one corner and pin

pin

Then continue to line up each corner with the other one and pin.  All corners should be lined up and it should have a little parachute thing going on.

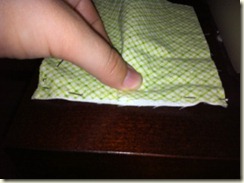
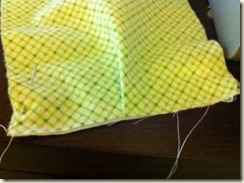
To sew the sides, you will notice that the top fabric has some extra fabric.  Pinch the extra fabric in the middle of one side, then lay it flat so that the machine will go over it smoothly.  I am visual so just see the picture.

fold

sew three sides

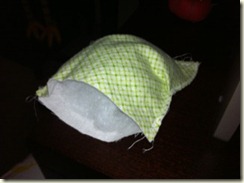
Sew three of the sides using a zig zag stitch, stuff, then sew the last side closed.  I used a zig zag stitch so that I wouldn’t have to use pinking sheers or no fray on all the edges.  Make sure the stuffing is light and fluffy so the quilt ends up squishy for the little one :)

stuff

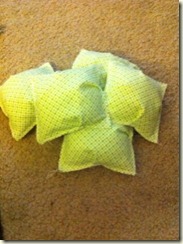
Once I got on a roll, they went fast. 

pillows

I am already almost half way through making all of my little pillows!  With any luck I may actually have this quilt done before he is born in February :)